When I got bored with the old scroll-bar and their tricks, I thought of inventing a new one on my own. In this post I am going to share everything (including pros and cons), about making a customized scroll-bar in Excel.
Caution : This is a meaty post.
Recommendation : Sit with a latte and enjoy! 😀
Lets start with some random data
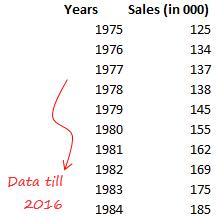
So we have here some random yearly data (nothing too significant) on Sheet 1. Our Objective is to make a timeline with customized scroll-bars
Breaking down the logic of Scroll-bar
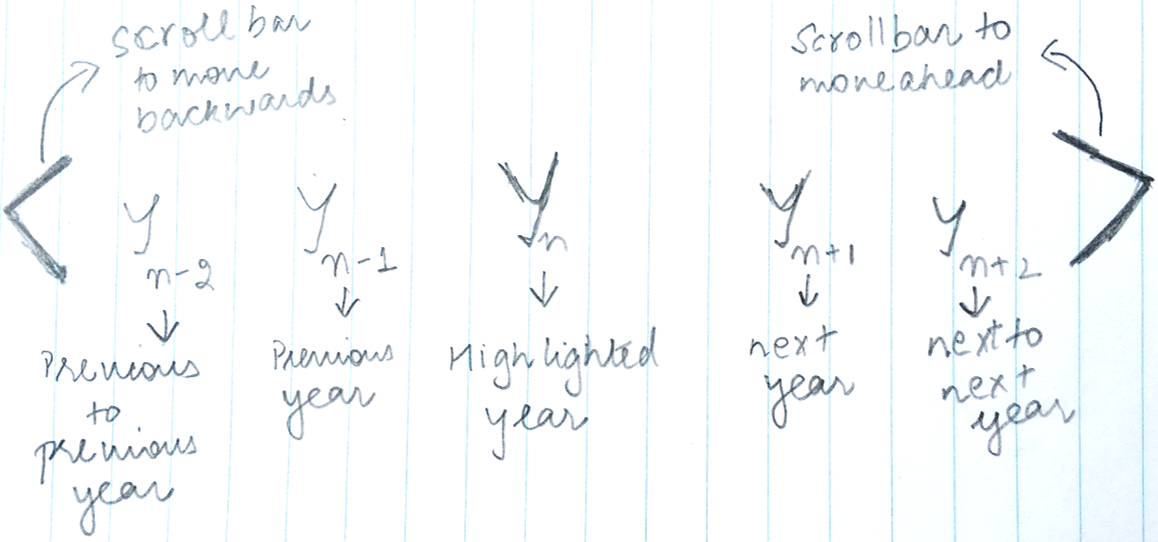
In the above illustration note that
- We have a highlighted year in the center
- 2 years ahead on the right and 2 years back on the left
- And the scroll-bars to move the years (ahead or backwards)
Setting up the spreadsheet
On Sheet 2, here is what I do
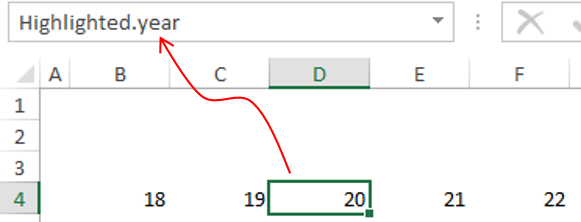
- Start with a number. Let’s say 20
- 20 +1 in the next cell and 21 + 1 in the next cell
- 20-1 in previous cell and 19 – 1 in previous cell
A few things to note
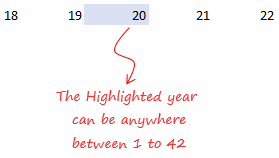
- In our data we have years from 1975 till 2016 i.e. = 42 years of data. 20 is any random number from 1 to 42.
- On sheet 2, we are writing numbers (and NOT years) because the data could be anything (text, product code, names etc..) for which you want to make a scroll bar, so we are indexing each data point to a number (starting with 1)
We have also named the middle cell as Highlighted year
Let’s Create the Scroll-Bars Now
Nothing fancy, but I am going to pick up a simple shape and make it look sexy
- Pick up the ‘Half Frame’ Shape
- Draw it while pressing the shift key. Shift key keeps symmetry
- Reduce the thickness with yellow nods
- Replicate the shape
- Rotate them
- And now you have something like scrollbars ready. We can definitely format them more, but for now they are good to go!
Related : Learn various shapes/objects related shortcuts
Linking the Scroll-Bars to our Data
Now that we have our scrollbars ready, our next job is to link them to the numbers in Sheet 2. Before we even do that, let me give you a bigger picture first. Try and understand the snapshot below
- There are 42 data points (from 1975 to 2016), correct?
- The highlighted year (as of now 20), can go up to 42 and can go down till 1
- If the highlighted year is 42 then the next two cells should be blank
- If the highlighted year is 1 then the previous two cells should be blank
Here comes a short Macro
To apply this logic to the Scroll-bars (that we have made), we need 2 tiny bits of code
Macro for Left Scroll-Bar
Sub custom_scroller_left()
 If [highlighted.year] >= 2 Then [highlighted.year] = [highlighted.year] - 1
End Sub
Marco for Right Scroll-Bar
Sub custom_scroller_right()
 If [highlighted.year] <= 41 Then [highlighted.year] = [highlighted.year] + 1
End Sub
Copy and paste both these macros in the VBA Window. Follow the steps
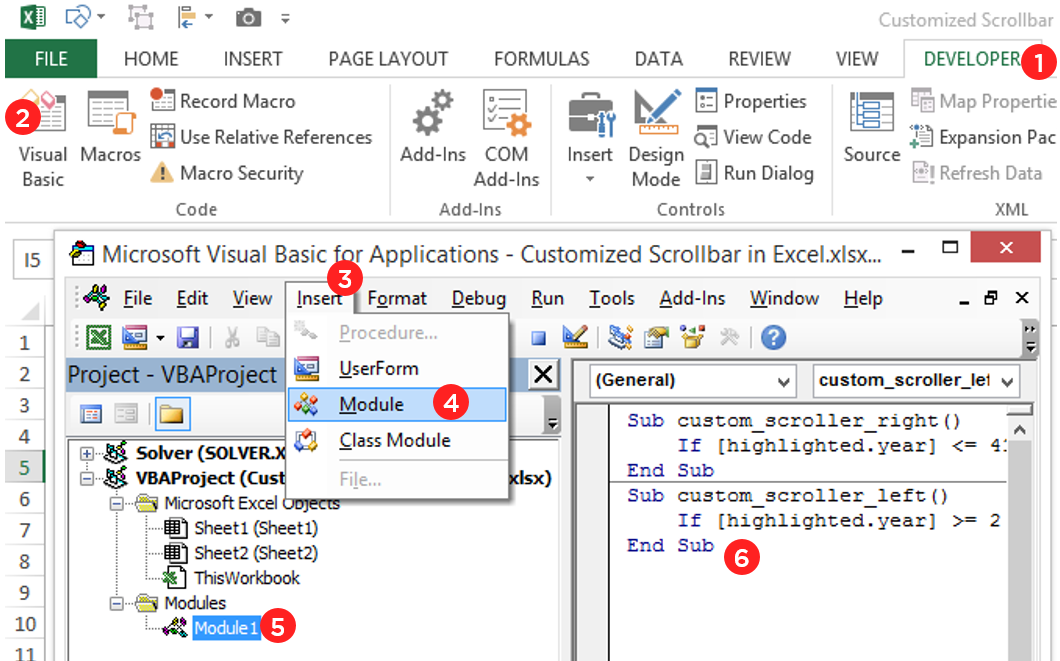
- Go to the Developer Tab (Press Alt + F11 if you cannot find it)
- Click on Visual Basic
- From the menu bar click on Insert
- And then click on Module (Module is the place where we write macros)
- Module 1 will be inserted. Double click on that
- And paste both the codes there
- Close the VBA Window
Now Simply Link the Scroll-bars to the Macros
- Right Click on the Shapes and go to Assign Macro
- Link the Shapes to the correct macro
The Last Part : Getting the years
- As of now we have got the numbers
- We have got the scroll bars working
But we don’t have the years displayed yet. Let’s get them too
- I will apply a simple INDEX formula to pull up years from sheet 1
- And wrap it around IFERROR function for turning off the errors to 0
And it is done! 😀
- Although our formatting is lose, which can certainly improve
- You can also hide the numbers and retain only the years
- You can now link anything to the years (using Vlookup or Index) and display it on your dashboard. In our case we could have linked Sales numbers
DOWNLOAD THE CUSTOMIZED SCROLLBAR EXCEL FILE
Advantages of Customized Scrollbars
- The foremost advantage is that it significantly improves the look of your Visualization/Dashboards
- You can even customize the aesthetics (color, shading etc) of the arrows shapes, which is not possible in the regular scroll bar
Disadvantages of Customized Scrollbars
- The biggest disadvantage is that each time you click, it only moves a single year forward/backward. I could not find a way to increment the years automatically in case the button is pressed for a longer time
- Since this working with Macros, it may seem a little daunting for people
Take a Look at the use of the Custom Scrollbar
I used this type of a scrollbar in making an Indian Republic Day Visualization. Check it out, it is pretty interesting and you can download it too!
Other Sophisticated Visualizations & Tricks
- 30 Day Challenge Dashboard
- How to make a sliding panel in Excel
- Turing a Data Dump into a Smart Visualization